VISUALS, VISUALS, VISUALS TIPS FOR SPECIAL EDUCATORS}
- Laura Hackwell

- Apr 9, 2021
- 2 min read
I don't know about you, but as a SPED teacher, I feel like 75% of my job is creating visuals! Ok, maybe that's an exaggeration, but seriously, visuals are so important for our kiddos! This year I have 6 out of my 7 students who are non-verbal or use a communication device, so every activity and every lesson requires some sort of visual. Here are my favorite tips and tricks for creating and managing visual supports in a special education classroom.

1. Color code or number your visuals. If you have multiple schedules or students with picture communication systems, assign a color or a number to each student. Print your visuals on colored paper, or number the back of the icon and when you end up with extras stuffed in your pants pockets, scattered across the room, or randomly appearing throughout the school, you will know exactly who to return them to!
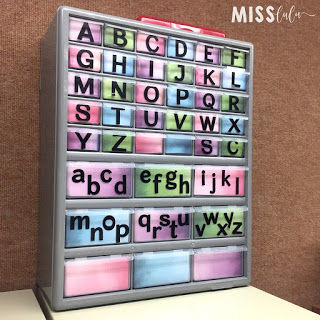
2. Have a system for organization. This is my favorite. I've also used a binder, CD pouches, Ziploc bags, or pocket charts.

3. Print extras! Whenever I need a visual, I always print extras. I put them in my organization system (see #2).
4. Save Velcro, use chip clips! This has been my new favorite thing this year. I use these black felt boards a LOT. They are great to eliminate distraction and present visuals at eye level. However, to use them, I have to put the hook Velcro on the back of all the visuals, even the ones we only use for one lesson. So to save Velcro, I've started clipping the visuals on using chip clips. It's quick (not as quick as Velcro, but you win some, you lose some) and cheap!

5. Save more Velcro, use felt. Another way that I save on the amount of Velcro that I use is by using felt in binders to stick the visuals too. You can buy sheets of binder size felt for less than a quarter each at any craft store. I just hold punch the sheets and use them to store my visuals on when I need them in binders.

6. Place stationary visuals around the classroom so they are always in the same spot and easily accessible. These are a few that I have around my classroom.

7. Create templates. I use PowerPoint to make my visuals, but you can also do this with Boardmaker or Smarty Symbols. Create a new document filled with the correct size of squares and save it as a template. Now, every time you need new visuals, just open up your template and place your images into your pre-made squares. And if you have students who need different size visuals or high contrast text, you can make a template for each student.
You can check out my "Visual Supports" Pinterest board for more ideas on using and managing visual in your classroom.
I'd love to hear your tips and tricks for using visuals! Leave me a comment below!


Comments